kubernetes in a nutshell

Kubernetes is one of the core components of modern software architecture. Each of our services has multiple instances which can scale up and down regardless of the time of the day. In a standard production environment, there can be hundreds to billions of those instances. Kubernetes comes to the rescue to manage them efficiently.
In this article, we are going to take a look at almost every aspect of Kubernetes. You will find it beneficial whether you’re just starting with Kubernetes or an experienced senior refreshing knowledge.
There are demo sections in the article. It is highly recommended to do them to get hands-on practice. You can find the demo code on this repository.
Let’s start.
table of contents
· what is kubernetes
· birds-eye-view of kubernetes
  ∘ kubernetes architecture
  ∘ the control plane
  ∘ the worker node
  ∘ kubernetes objects
  ∘ pods
  ∘ deployments
  ∘ services
  ∘ ingress
· installing kubernetes
· pods
  ∘ demo time: deploying a pod
· namespaces
· deployments
  ∘ rolling updates
  ∘ rollbacks
  ∘ demo time: scaling, rollouts, and rollbacks with deployments
· services
  ∘ endpoints
  ∘ service types
  ∘ demo time: make an app accessible from the browser with services
· ingress
  ∘ demo time: host-based and path-based routing with ingress
· configmaps and secrets
  ∘ configmaps
  ∘ secrets
  ∘ demo time: configmaps and secrets
· statefulsets
· conclusion
what is kubernetes
Kubernetes is an application orchestrator. It deploys and manages applications.
It is mostly used for cloud-native microservice applications. Cloud-native is a term that means it supports features clouds need, such as scaling, rollout, and rollbacks.
Microservices is a pattern where you divide your application into small and independent logical parts, such as user service, invoice service, and product service.
So Kubernetes helps us to manage our microservice applications and provides automated and powerful features such as scaling, rollout, and rollbacks.
Other interesting bits about Kubernetes,
- It was developed by Google and donated to Cloud Native Computing Foundation (CNCF).
- It’s an open-source project written in Go.
» go back to table of contentsbirds-eye-view of kubernetes
We will take a high-level look at Kubernetes; the architecture and objects.
kubernetes architecture
A Kubernetes cluster is a set of nodes. There are two types of nodes; control plane nodes and worker nodes. A node can be a physical server, virtual machine, or cloud instance.
- control-plane nodes are the brain of the cluster; they manage workload.
- worker nodes are for executing the workload given by the control plane.

The architecture looks a bit complex but looking at the process of running an application in Kubernetes makes it easier to understand.
At a high level, we specify our app requirements such as which image to run, which port to expose, and how many replicas (application instances) we need. We write these down in a YAML file, which is called a manifest file. We then give it to Kubernetes and it handles the rest of the work.
Here are the steps of the process,
- we define our requirements in a manifest (YAML) file.
- execute a terminal command to send our manifest file to kubernetes.
- kubernetes checks our requirements and finds an appropriate worker node.
- the worker node runs the application as specified in our file.
- a periodical check is done to ensure the running application features match what we specify in our file.
Before going any further, if you’re new to Kubernetes and these steps look quite abstract, don’t stress yourself out. We have hands-on demo sections which will make it easier to understand for you. Just try to grasp the idea this time, then you can come back to this section after doing the practices.
While keeping the steps in mind, let’s take a look at what happens at a low level.
the control plane
- the API server is the center of all communication between all components. When you execute a command in the terminal to deploy our pod, it sends a POST request to the API server.
- cluster store is a stateful part of the cluster. It stores the configuration and state of the cluster. For example, it keeps the information that we want to have 5 replicas.
- controllers are smart objects of Kubernetes that provide cloud-native features. You will usually deploy your application using a controller.
- scheduler listens to the API server for new work and finds an appropriate node for the work. If it can’t find a healthy node, the work remains in a pending state.
So, when we execute a terminal command to deploy our application, behind the scenes, we POST the file to the API server. The cluster store persists our requirement. Scheduler finds a healthy node to execute the work.
the worker node
Our applications run in worker nodes. They listen for the new work, execute it and report it back.
- kubelet listens to the API server for new work, executes it and reports status back to the control plane.
- container runtime does container-related tasks such as pulling images and running the container. Kubernetes removed Docker, however, it just got rid of unnecessary parts of Docker, it’s still using the core component, containerd.
- kube-proxy is used for networking inside a cluster. It handles IP assignments, routing, and load-balancing on the pod network.
So, when the worker node gets new work, it executes it and reports it back. The controller periodically checks what we want (defined in our file, called desired state) matches what we have (actual state). If they don’t match the control plane controllers take the necessary action to match them.
kubernetes objects
These are default Kubernetes objects. We will take a deep dive into each of them throughout the article.
pods
- pods are the smallest unit of Kubernetes.
- usually, a single pod runs a single container. There are scenarios where you run multiple containers in a pod.
- pods are not responsible for running applications, they just provide an environment.
- pods are immutable.
deployments
- you can deploy pods by themselves but controllers provide pods with rich features, such as scaling, and self-healing.
- some of the controllers are Deployments, DaemonSets, and StatefulSets.
services
- pods come and go so accessing them directly with IP is not a stable approach. services provide stable DNS.
- services monitor healthy pods and route the requests to them in a load-balancing fashion.
ingress
- ingress allows us to redirect requests in a more intelligent way. we can route requests based on certain conditions.
» go back to table of contentsinstalling kubernetes
If you’re using Mac or Windows you can get a good Kubernetes environment with Docker Desktop. You can also use cloud environments. Since the installation details can change often, we won’t discuss them here.
» go back to table of contentspods
Pods are the smallest unit of Kubernetes. They wrap the containers and provide additional features. We can add labels to group pods, add health probes to find out healthy pods, and provide resource limits.
Pods have hundreds of fields that you don’t need to memorize. With the following commands, you can access the details of each feature.
kubectl explain pods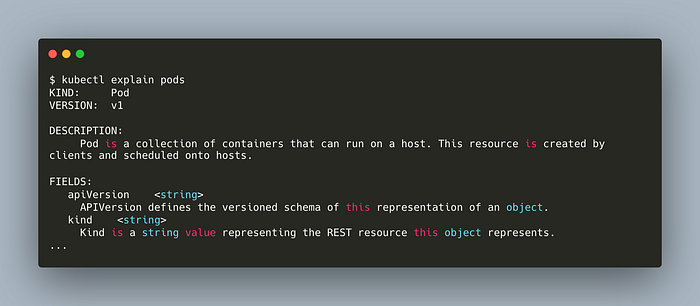
You can check the details of a specific field with this command,
kubectl explain pods.spec.volumes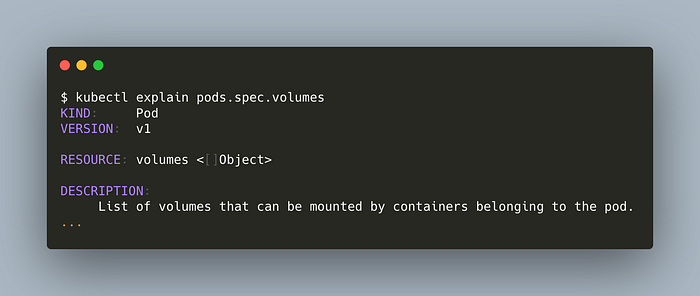
Let’s take a look at a simple pod.
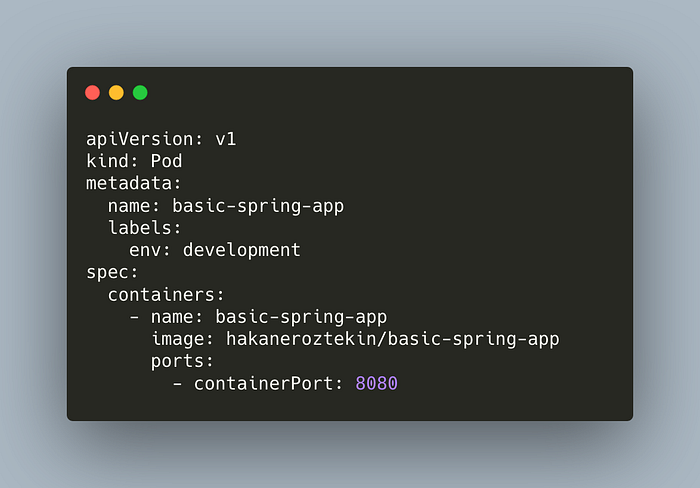
- apiVersion defines the schema version.
- kind specifies the object type.
- metadata specifies the pod in a unique way which helps to group pods by these labels.
- spec is for defining containers.
» go back to table of contents
» skip the demo, jump to namespaces
demo time: deploying a pod
In this demo, we’ll deploy a simple pod, check logs and then delete it.
Clone the clone to your computer if you haven’t before,
git clone https://github.com/hakaneroztekin/kubernetes-manifest-samples.gitCheck the running pods,
kubectl get pods 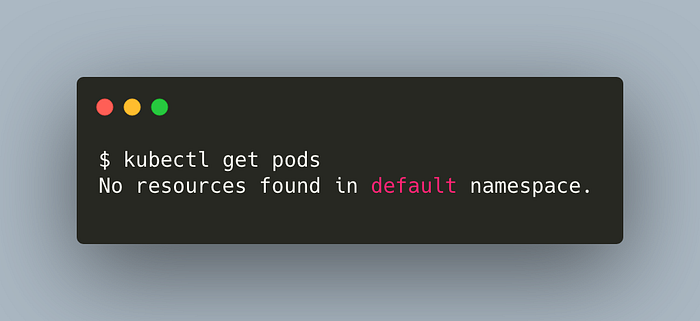
We’re going to deploy the pod manifest we’ve seen before,

This app is a basic Spring app with a single controller. It returns a message when we hit localhost:8080.
Deploy the pod declaratively,

Check the pod,

Check the logs,
kubectl logs basic-spring-app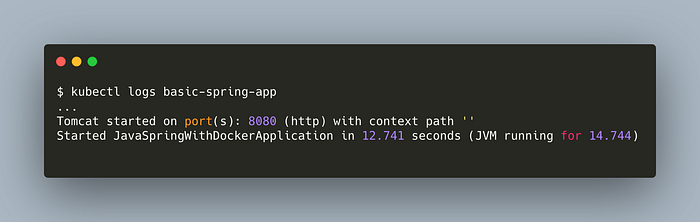
Note that, we can’t access our app in our browser atlocalhost:8080. We’re going to make it accessible in the demo section of services.
Voila. We’ve successfully deployed a pod.
Delete the pod,
kubectl delete pods basic-spring-app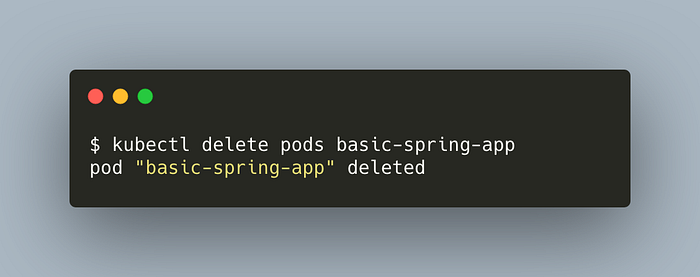
Congratulations. We’ve specified a simple pod, and deployed it on a cluster. Now, what if the node running our pod fails? Our pod is lost. To prevent this we need self-healing. Deployment controllers provide this and other nice features. We’ll discuss them in a moment.
» go back to table of contentsnamespaces
Namespaces allow us to virtually split our cluster into sub-groups. We can specify different resource limits and users for each namespace. It is important to note that they don’t provide strong isolation.
» go back to table of contentsdeployments
Deployments give superpowers to our applications such as self-healing, scaling, and rollbacks.
There are multiple types of controllers. We will discuss deployment and ReplicaSet in this chapter, and StatefulSet in a later chapter.

The deployment manifest file consists of multiple subgroups. As you may have noticed,
- containers part (the last part) is similar to a Dockerfile.
- template part is similar to a Pod manifest file.
Take a look at the following image,
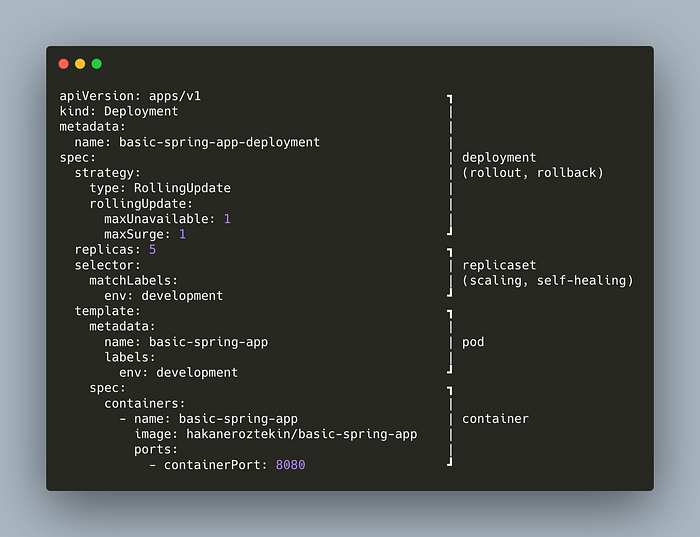
The container part is related to a container. Pod wraps container. ReplicaSet, wrapping pod, adds scaling, and self-healing features. Deployment wraps ReplicaSet and adds rollout and rollback strategy.
rolling updates
Rolling update (rollout) means a new deployment. We update our deployment manifest file, post it to Kubernetes and it handles the rest. Depending on our rollout strategy, it creates new pods and kills old ones.
We can manage our strategy by adjusting these fields,
- maxUnavailable defines the limit of how many pods can be unavailable at a time. If our replica count is 5 and maxUnavailable is 2, at least 3 replicas can be running at any time.
- maxSurge defines the limit of how many additional pods can be running at a time. If our replica count is 5 and maxSurge is 1, at most 6 pods can be running at any time.
We can increase these numbers for faster but less-safe deployment, and keep them low for slower but safer deployment.
rollbacks
Rollback is reveting deployment to an older version. Imagine there’s a bug with the new deployment, in this case, you’d want to get back to the older version.
Kubernetes creates a new replicaset with each deployment. When you use a newer version to deploy, a second replicaset is created. The old one will still remain in the system. Thus, when we need to rollback, Kubernetes just uses the old replicaset.
We will see these features in practice in the demo section.
» go back to table of contents
» skip the demo, jump to services
demo time: scaling, rollouts, and rollbacks with deployments
In this demo, we’re going to deploy our pod with deployment controller, scale it up and do a rollback.
Clone the clone to your computer if you haven’t before,
git clone https://github.com/hakaneroztekin/kubernetes-manifest-samples.gitHere’s our deployment manifest. It’s the same we’ve seen in the deployments chapter.
Check active deployments,
kubectl get deploymentsDeploy our app,

Check the pods. Add --watch flag to automatically refresh the response when pod statuses change.
kubectl get pods --watch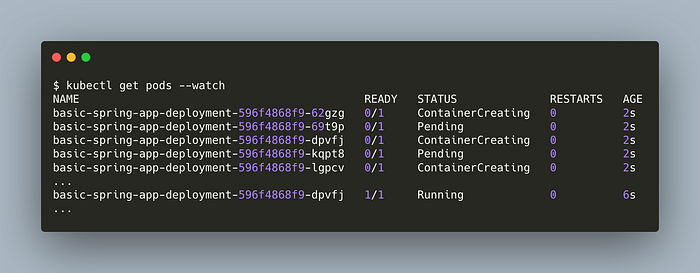
Update the spec.replicasin the manifest to 8 and apply the manifest again.
Get the deployment status,
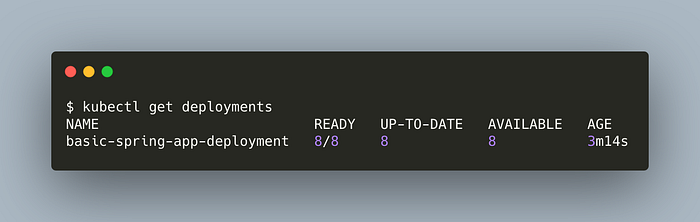
We’ve successfully scaled up our application. Now, we’re going to practice rollbacks.
Let’s update our application version. Update the image tag to 2.0. The spec section of our deployment file should look like this,
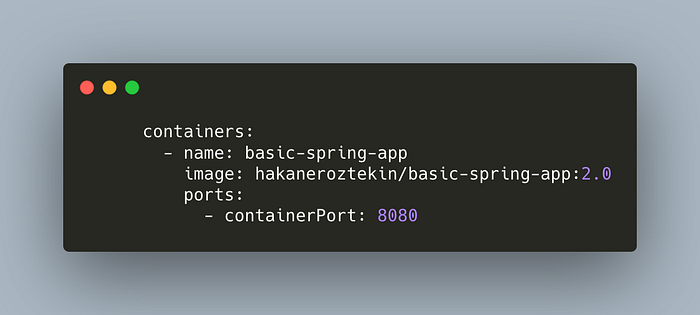
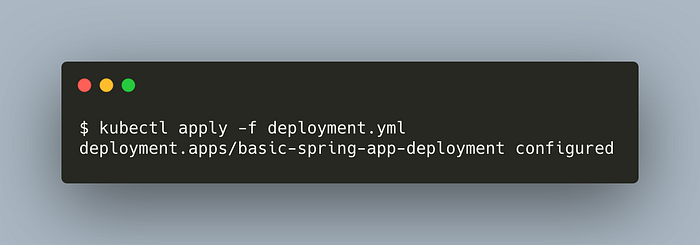
You can click here to see the full manifest file. Now, deploy the manifest again. We’ll use the record=true flag to save this command in the change list. We’ll see it in action in a moment.
kubectl apply -f deployment.yml --record=trueCheck the ReplicaSets,
kubectl get replicasets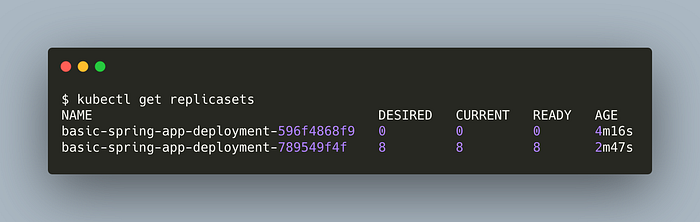
As you can see, there are 2 replicasets, the latter is the newer and active. Even though the old one is not used by any deployment, it still remains in the system. Now, we will do a rollback to that old replicasets. In other words, rollback making deployment with an older replicaset.
Get the rollout history,
kubectl rollout history deployment basic-spring-app-deployment
Now, we can see the effect of the record flag. It saves our command in the change-cause.
Let’s rollback to the first revision.
kubectl rollout undo deployment basic-spring-app-deployment --to-revision=1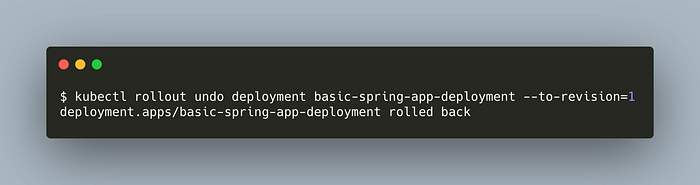
Let’s list the replicasets again
kubectl get replicasets
We’ve successfully done a rollback!
There’s one question left. Our app is exporting the port 8080 though we can’t access it when we hit localhost:8080. This is exactly what we’re going to do in the demo of services section.
» go back to table of contentsservices
Services provide stable networking. As you’ve seen in the deployments chapter, we can scale up and add new pods or rollout to kill old pods while creating new ones. Since each pod has its own IP, there’s no guarantee that we can access the app using the same IP. In addition, the pod network works inside a cluster so we can’t access it from outside, for e.g. from our browser.
Services have a fixed IP, DNS, and port. They watch the current status of pods and redirect the traffic to healthy ones. Services find related pods using label selectors. They also provide basic load-balancing out of the box.
endpoints
An endpoint is a Kubernetes object. When we create a service, Kubernetes finds healthy pods matching the service label selector. Then those pods are added to the endpoint list. This list is periodically updated.
When traffic hits the service, the service uses the endpoint list to route traffic.
The newer versions of Kubernetes have the EndpointSlices object which is a more capable version of the Endpoints object.
service types
- ClusterIP provides a network that is only accessible inside a cluster. Each pod can resolve a service by its DNS name using the cluster’s DNS service and access it.
- NodePort provides a network that is accessible outside the cluster. NodePort services are built on top of ClusterIP services by exposing a port outside the cluster. This port is called NodePort.
- LoadBalancer integrates with 3rd party cloud providers to create a service that’s accessible on the internet.
Let’s create a NodePort service.
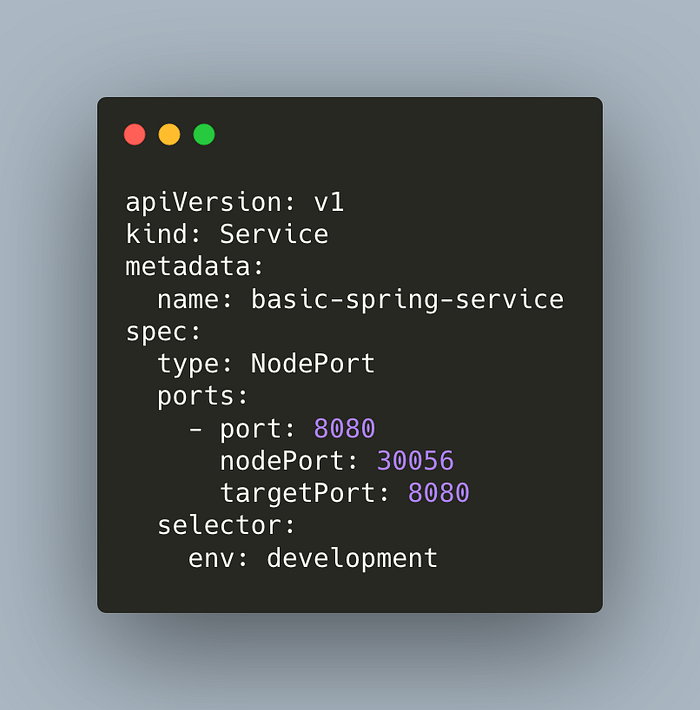
This service matches the pods with the label env:development. This is just for demo purposes, you can consider adding an app name in your labels for your clusters too.
Pods in the cluster can access this service using port 8080. Outside access is made available at the port 30056. Both are mapped to the port 8080 of the container.
» go back to table of contents
» skip the demo, jump to ingress
demo time: make an app accessible from the browser with services
Let’s deploy a service.
Clone the clone to your computer if you haven’t before,
git clone https://github.com/hakaneroztekin/kubernetes-manifest-samples.gitHere’s our manifest,
Post it to Kubernetes,
kubectl apply -f service.yml
List the services,
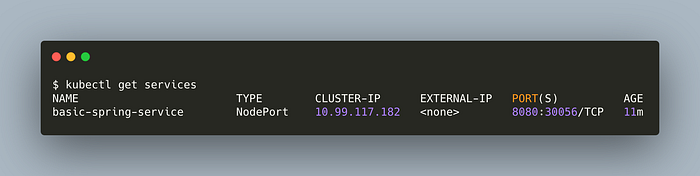
Now, hit localhost:30056in your browser.

Congratz. We’ve made our accessible from the outside world :)
Let’s list the endpoints,
kubectl get endpoints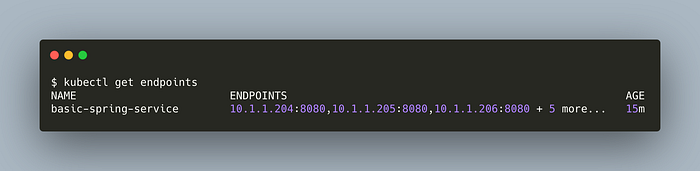
Each of them is a healthy pod. Once we make a request to access, the service checks for the endpoints and picks one pod to route our request in a load-balancing fashion.
» go back to table of contentsingress
Ingress is a more capable version of a service. We need a service for each of our applications when we use a LoadBalancer service. For example, if we have 8 apps, then we need 8 services. This is not cost-efficient. With Ingress, we expose multiple services with a single LoadBalancer service.
So how does Ingress know which service to route traffic to? How does it know we want to access user service, not invoice service? Ingress uses host-based and path-based routing for that.
Ingress and service meshes have similarities. Service meshes are an alternative to service-to-service communication. We won’t dive deep into service meshes but if you have them you may not need an Ingress.
» go back to table of contents
» skip the demo, jump to configmaps and secrets
demo time: host-based and path-based routing with ingress
In this demo, we will use a host-based ingress which will route,
order.localhosttoorder-serviceuser.localhosttouser-service
Then we will do a path-based routing which will route,
localhost/ordertoorder-servicelocalhost/usertouser-service
Clone the clone to your computer if you haven’t before,
git clone https://github.com/hakaneroztekin/kubernetes-manifest-samples.gitGo to the ingress folder.
We will deploy two pods and two services,
- user-app-pod
- order-app-pod
- user-service
- order-service
Services are ClusterIP services that map ports 8080 to 8080. They are not accessible outside since they’re not NodePort services. Ingress will be exposed.
Here’s our host-based ingress manifest,
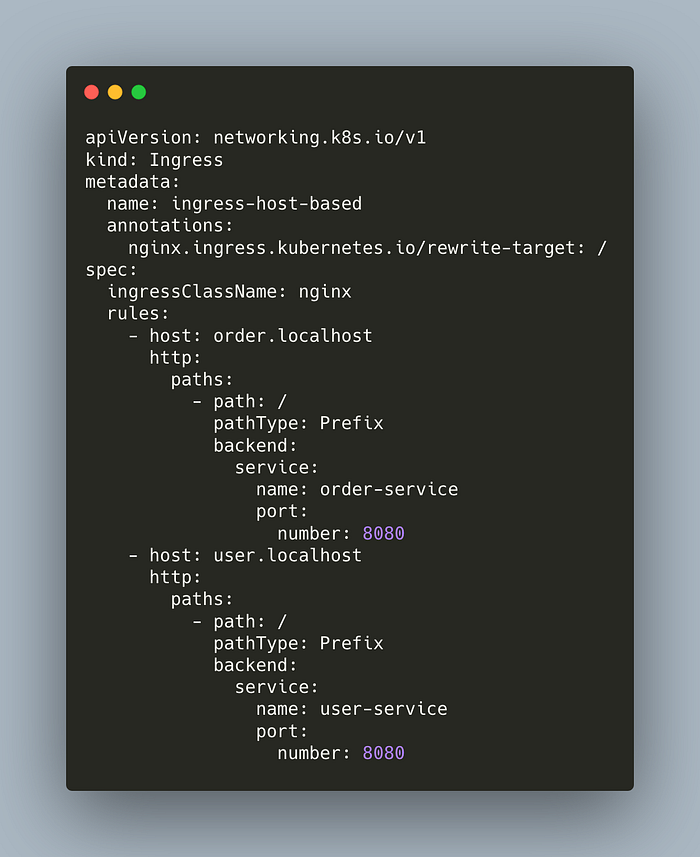
We are defining two rules. Ingress redirects request to order.localhost at / path to order-service. It does similar work for the user service.
Deploy the ingress,
kubectl apply -f ingress-host-based.ymlCheck it,
kubectl get ingresses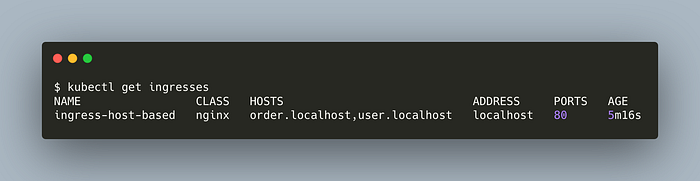
Hit user.localhost on your browser,
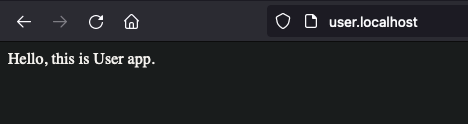
Great. What about order.localhost?
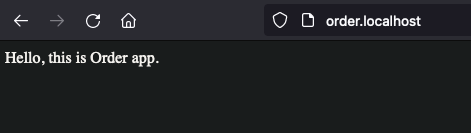
That easy. Now, let’s do the path-based routing.
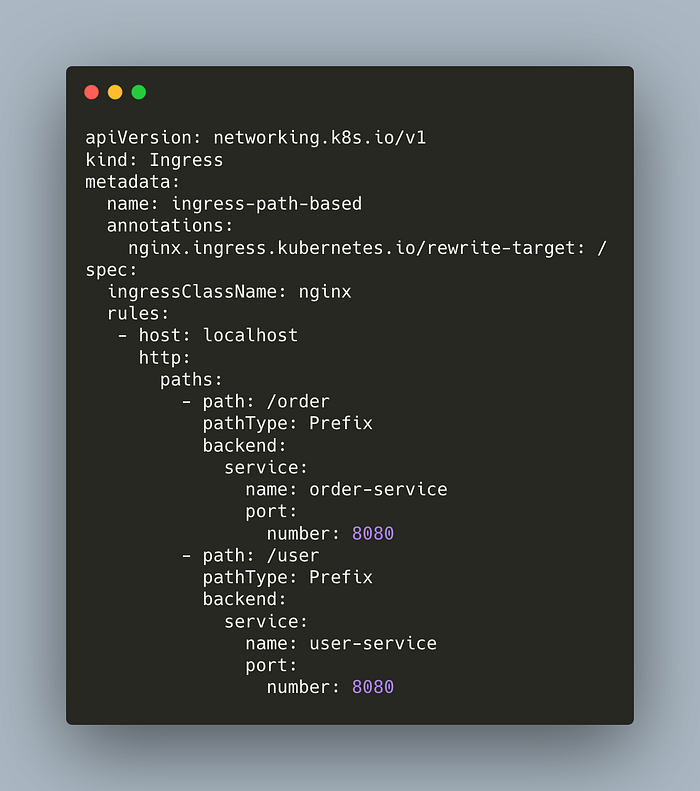
We’ve updated our rules with path-based routing. It redirects to related services by the path.
Deploy it,
kubectl apply -f ingress-path-based.ymlHit your browser at localhost/user
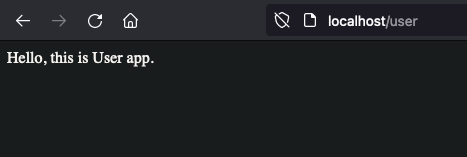
Great. Now for localhost/order

Delete ingresses,
kubectl delete ingress ingress-host-basedkubectl delete ingress ingress-path-based
That’s it. We’ve successfully applied Ingress intelligence. As you’ve seen, it is similar to services but it has the capability of conditional routing.
» go back to table of contentsconfigmaps and secrets
configmaps
ConfigMaps are useful to decouple application and configuration. We can have a generic image for each of our environments (e.g. dev, stage, and prod) and customize it with configmaps.
For example, we can inject the configuration of a database, environment variables, and so on.
Let’s take a look at a simple configmap.
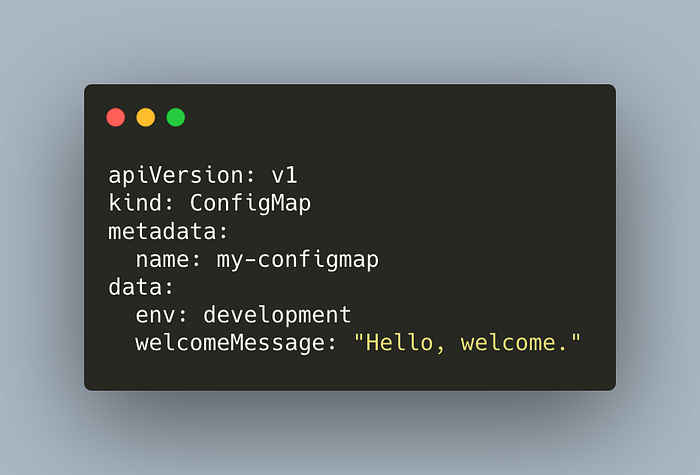
The manifest defines a ConfigMap with two entries.
There are three ways to inject a configmap into our pods;
- As environment variables
- As startup commands
- As files in volumes
The ConfigMaps with the first two options will be static. Once the app starts, you can’t change them afterward. The most flexible option is injecting a ConfigMap with a volume.
We’re going to use it in the demo section. We will see that updates to the ConfigMap will be reflected in the pod in a minute or two.
secrets
Secrets are the same as ConfigMaps but they are for credentials such as usernames, passwords, and tokens.
Secrets in Kubernetes are not secure by nature. The applications have to see the decoded version of the Secrets, so they are not encoded in the network. Further, they are only encoded with the basic base64 encoder. So it is very easy to decode them. To secure Secrets, it is recommended to use EncryptionConfiguration or 3rd party tools such as Hashicorp’s Vault.
Let’s take a look at a basic secret,
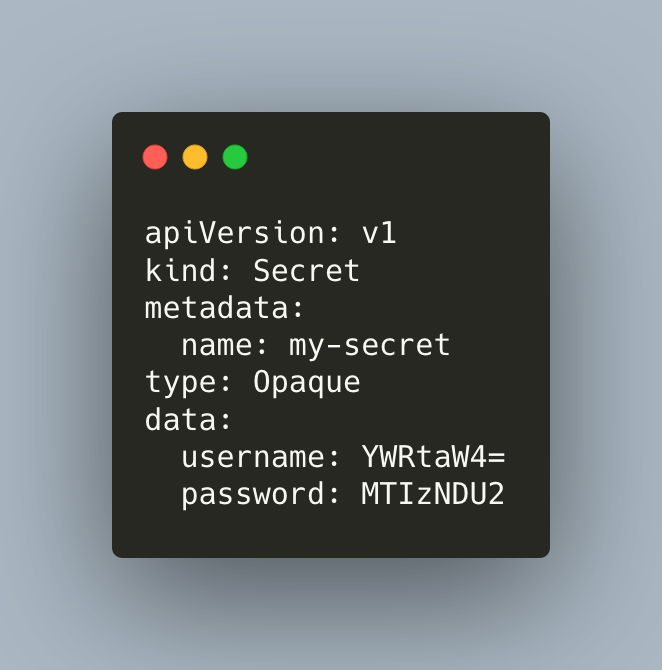
The secret manifest defines two fields. As you can see the structure is the same as of ConfigMap.
Similar to ConfigMaps, we can inject secrets to pods with volume mapping. We’ll do this in the demo section.
» go back to table of contents
» skip the demo, jump to statefulsets
demo time: configmaps and secrets
In the first part of the demo, we’ll deploy a ConfigMap in our cluster, inject it into a pod, and update it without killing the pod. In the second part, we will deploy a Secret, inject it into a pod, and also decode it easily.
Clone the clone to your computer if you haven’t before,
git clone https://github.com/hakaneroztekin/kubernetes-manifest-samples.gitThis is the ConfigMap we’ll deploy in our cluster,
Deploy the configmap,
kubectl apply -f basic-configmap.ymlList the configmaps,
kubectl get configmapsDescribe our configmap,
kubectl describe configmap my-configmap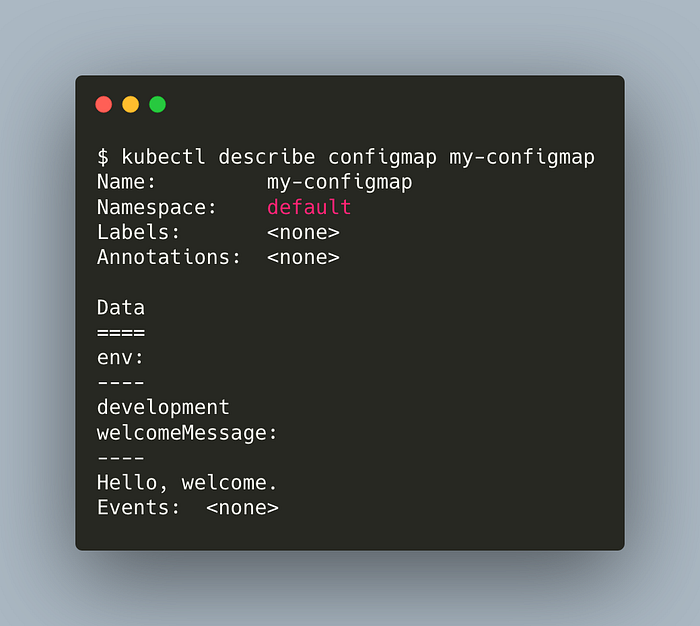
The result doesn’t look very tidy but we can see our two entries.
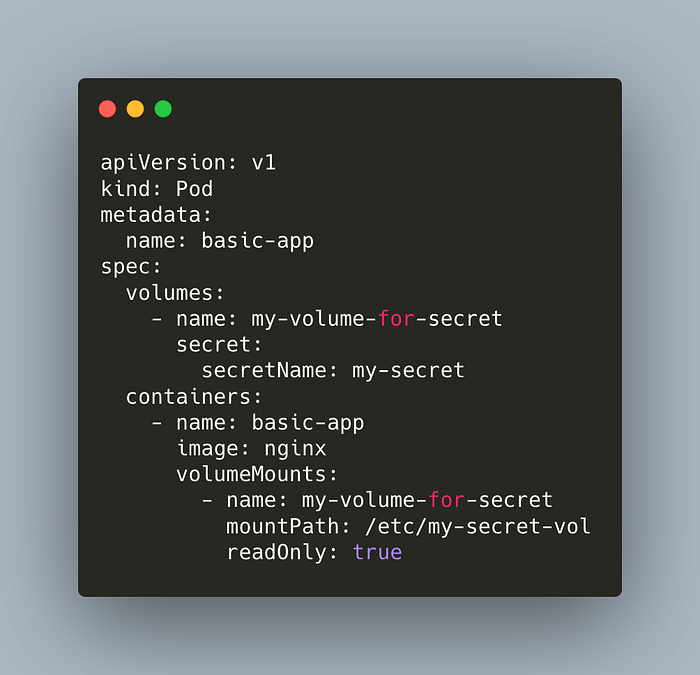
Here’s our pod manifest. Notice the volume mapping.
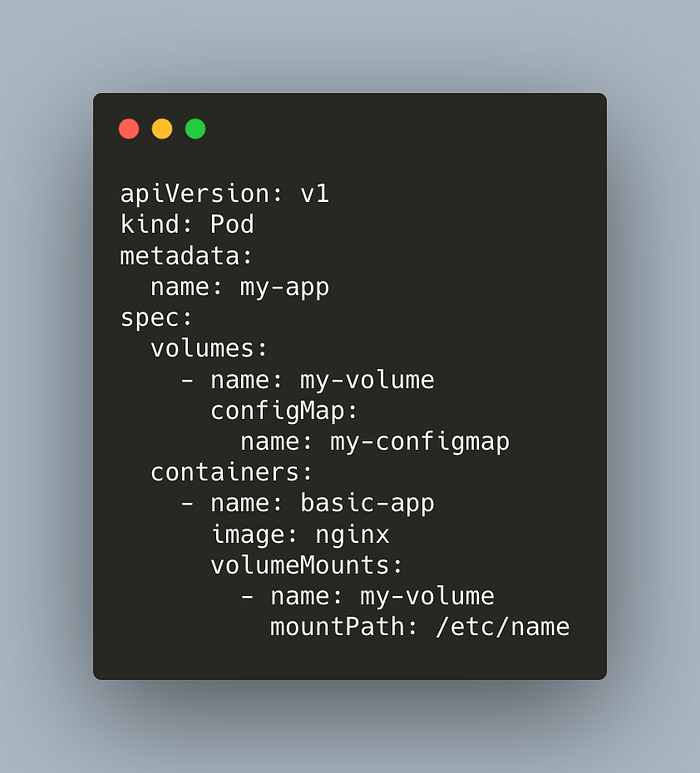
Deploy the pod,
kubectl apply -f configmap/pod-configmap.ymlLet’s check if our pod can access the ConfigMap data.
kubectl exec my-app -- ls /etc/name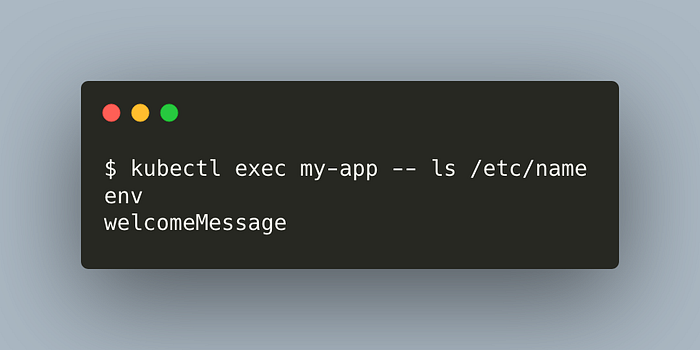
Great. What about the data inside them?
kubectl exec my-app — cat /etc/name/env
kubectl exec my-app — cat /etc/name/welcomeMessage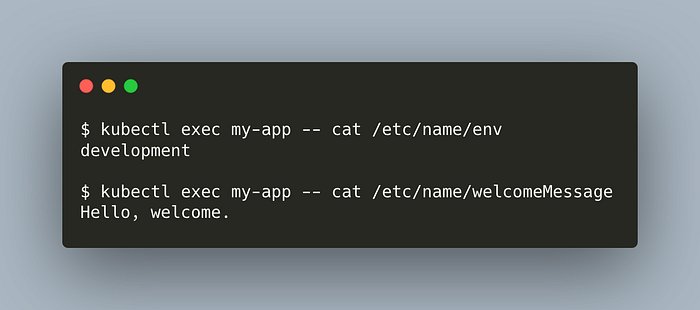
Great. Let’s update our ConfigMap manifest, and deploy it.
kubectl apply -f configmap/basic-configmap.yml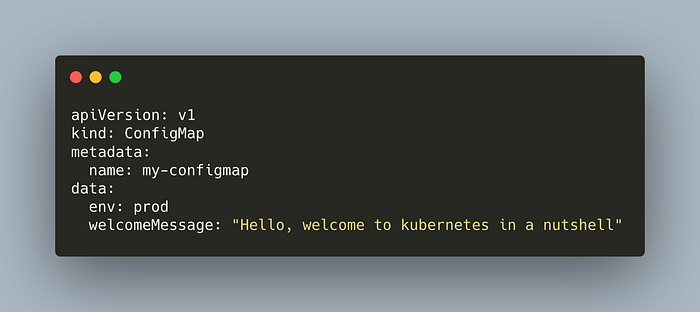
Run the same commands as before to see the contents of our ConfiMap data. The changes will be reflected in a pod in a minute or two.

Awesome. Without changing the pod at all, we dynamically changed the configmap. That’s it for ConfigMaps. Let’s proceed with Secrets.
Here is our Secret,
Let’s deploy the Secret,
kubectl apply -f basic-secret.ymlList the secrets,
kubectl get secretsDescribe our secret,
kubectl describe secret my-secret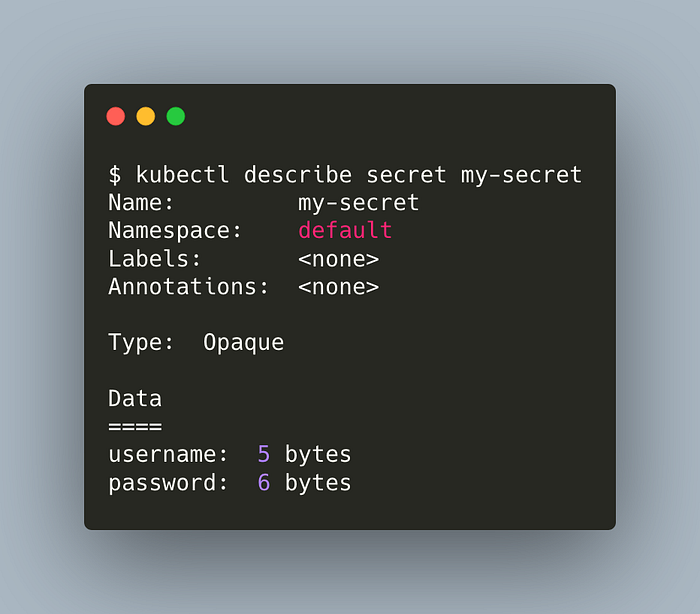
We can see our two keys but their details are hidden. Well, so far.
Let’s deploy the following pod manifest.
kubectl apply -f configmap/pod-secret.ymlList the secret fields,
kubectl exec basic-app -- ls /etc/my-secret-vol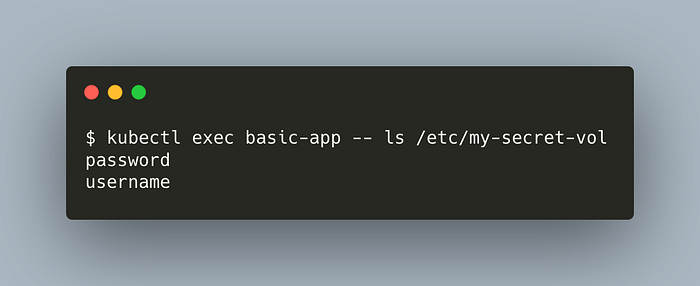
What’s inside them?
kubectl exec basic-app — cat /etc/my-secret-vol/username
kubectl exec basic-app — cat /etc/my-secret-vol/password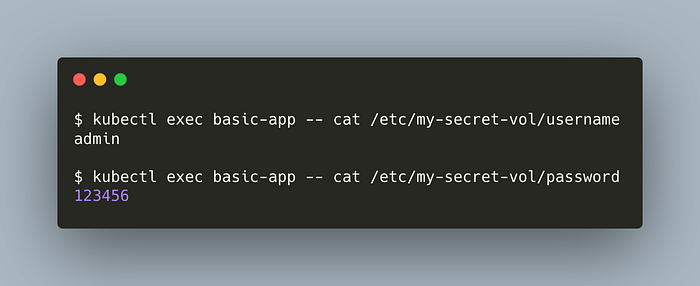
As you can see, Secrets are not really secure. Therefore, it is advised to use EncryptionConfiguration or 3rd party tools such as Hashicorp’s Vault.
Great, in this demo we practiced ConfigMaps and Secrets.
» go back to table of contentsstatefulsets
StatefulSets are for stateful applications. Examples of stateful applications are databases or applications that keep user sessions to be used for future sessions.
Let’s take a look at the statefulset architecture,

The first pod has access to read/write replica of mysql; the others only have access to the read replica.
Pods of Statefulsets are predictable. Statefulsets guarantee mapping of Pod names, DNS hostnames and volume mappings. This means, the first created pod always has the name my-pod-1 and access to mysql r/w replica. The next one will have the name my-pod-2 and access to mysql read replica, and so on. Any consumer service can directly access to my-pod-1 and it is guaranteed that it will have write privilege.
» go back to table of contentsconclusion
Kubernetes is one of the core tools of modern architecture. It has various terminologies like pods, replicasets, and rollbacks. It manages our applications with respect to the manifest files.
I would like to thank Nigel Poulton for his amazing book, The Kubernetes Book. Some of the information and examples in this article are adapted from the book. It is highly recommended if you want to learn more about almost all aspects of Kubernetes.
If you would like to follow me, check out my Medium profile, and LinkedIn, I share posts when I publish new articles. Let me know whether you liked the article and what I can change to make it better. Thanks for reading.
